Author Archives: Steve Hutton

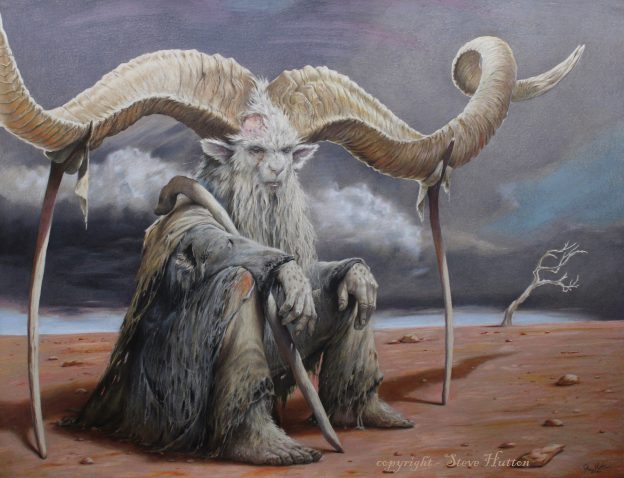
Artwork – The Burden
The Burden
Taking a break from the long term tarot project, I drew a picture for our times. . .
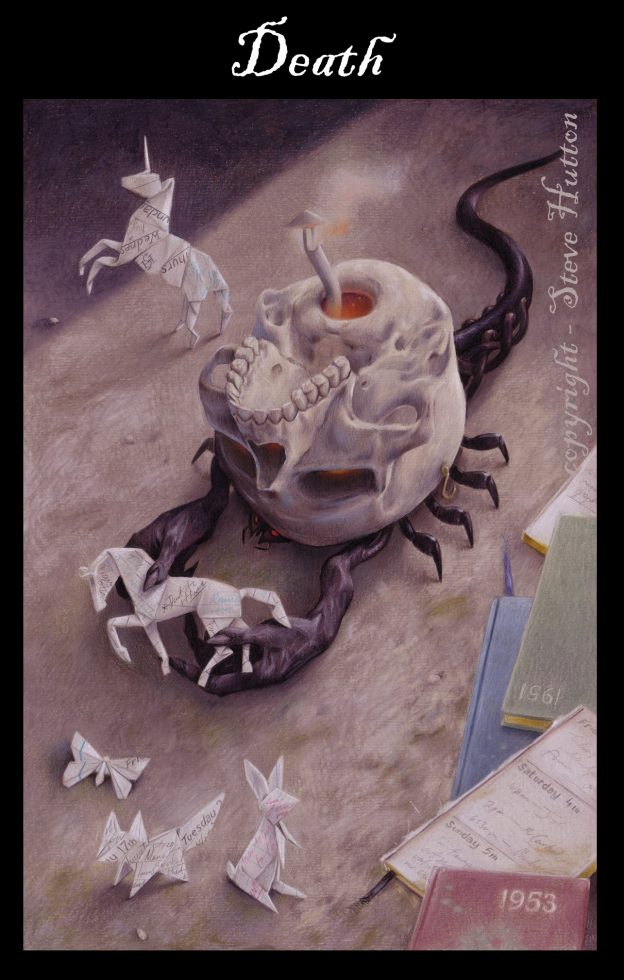
Artwork: Death
The first of a pilot project to illustrate a Tarot deck entitled ‘Land of Giants’. The story is about all the small magical folk that live within the crumbling walls of an abandoned English manor house. Death is one of the 22 major arcana cards and has a meaning of transformation. This mysterious creature (death) is turning old diaries (finished lives) into works of art.
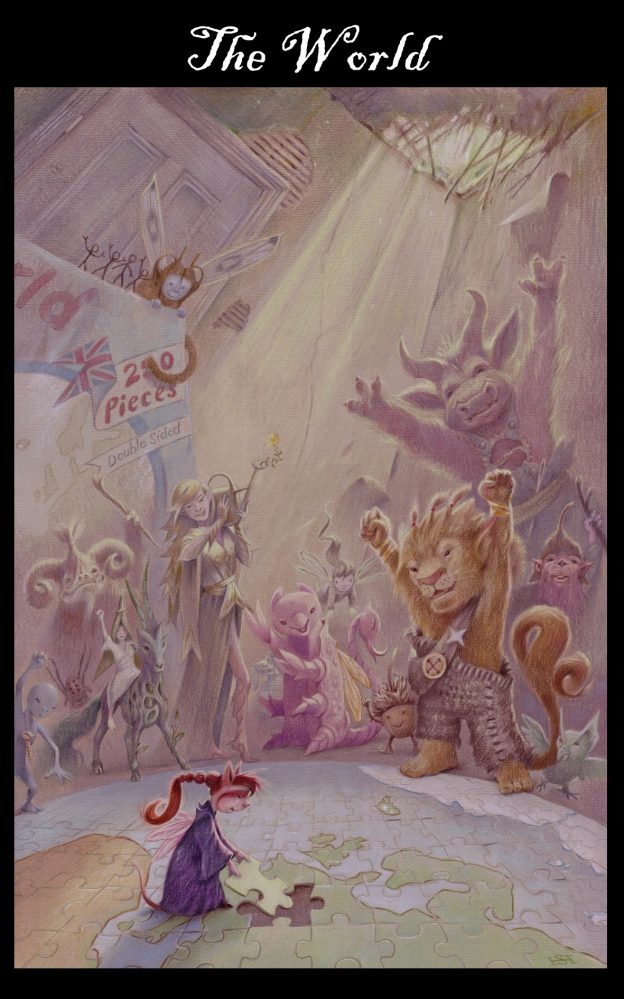
Artwork – The World
The first of a pilot project to illustrate a Tarot deck entitled ‘Land of Giants’. The story is about all the small magical folk that live within the crumbling walls of an abandoned English manor house. The World is one of the 22 major arcana cards and has a meaning of completeness and revelation (amongst other things).
The residents of this forgotten manor house have at last found the missing piece of the jigsaw they’ve waited months to finish: The World. The four elements, Scorpio, Taurus, Leo and Aquarius make guest appearances in this piece.
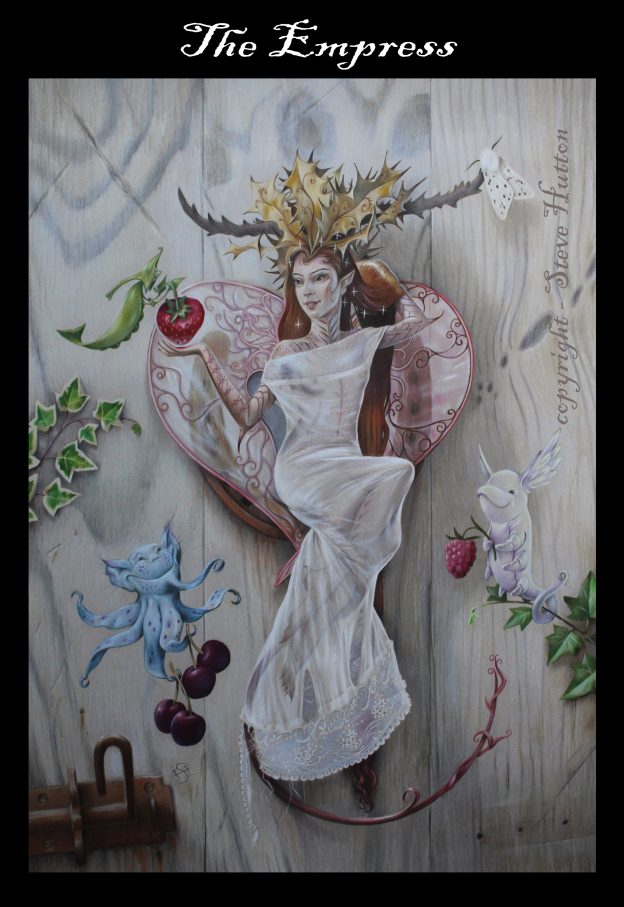
Artwork: The Empress
The first of a pilot project to illustrate a Tarot deck entitled ‘Land of Giants’. The story is about all the small magical folk that live within the crumbling walls of an abandoned English manor house. The Empress is one of the 22 major arcana cards and has a meaning of bounty and beauty (amongst other things).
I imagined she’s sitting in the gardens, admiring the fruits brought to her for blessing by a succession of magical folk. As The Empress card embodies the feminine and fertility I played the wedding card a bit, adding a horseshoe and (if you can’t tell) her dress is an old stocking. Overall, the card needed a very positive feel and I hope I’ve captured that.
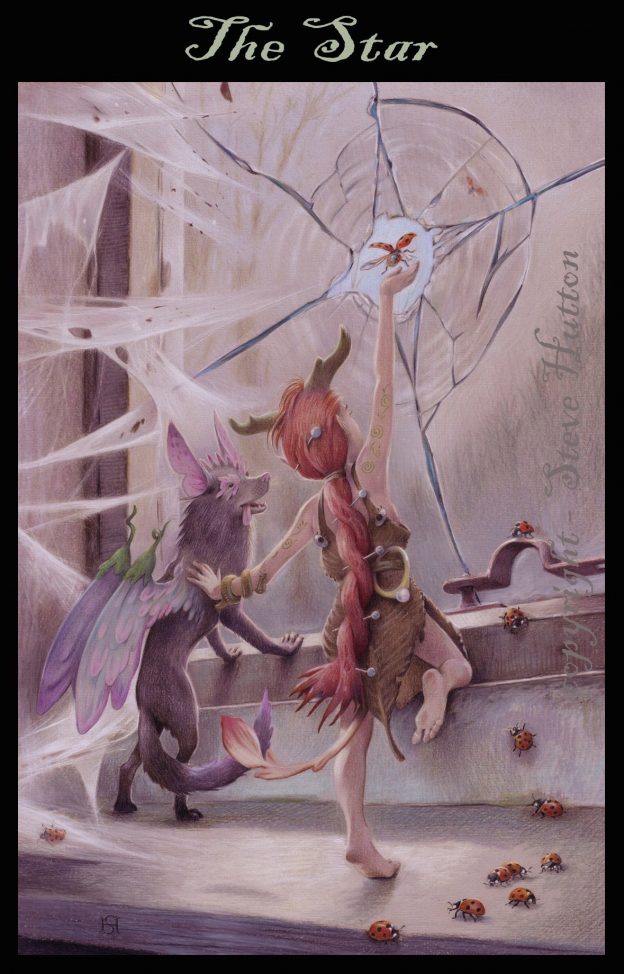
Artwork: The Star
The first of a pilot project to illustrate a Tarot deck entitled ‘Land of Giants’. The story is about all the small magical folk that live within the crumbling walls of an abandoned English manor house. The Star is one of the 22 major arcana cards and has a hopeful meaning. The small fairy-like creature is helping trapped ladybirds to escape through a hole in the window – ‘the star’.
Pencils
Coloured Pencils – handy things to know . . .
All of my Wildwood art is drawn in colour pencil, and for those with an interest in this particular medium here’s an article about getting the best from your pencils.
First I gather the reference photos I’ll need, ones I’ve taken myself or sourced from elsewhere. Then I visualise how I’ll piece them together. I always use Daler Rowney pastel paper. It has a rough side and a smooth side and I always use smooth. Most of the time I’ll use Platinum: a neutral mid-grey shade. It might sound odd drawing on grey paper but I find that drawing with colour pencil on white paper spoils the effect, as the pigment leaves all the tiny dips and depressions in the paper uncovered and you end up with a kind of ‘white noise’ behind the image that breaks up its solidity. But that’s just me – a lot of CP artists like white paper.
Graphite can dirty the colours you lay on top, but to start with I sketch up my image with a 2B pencil, and this can take up to a day as I try out different compositions. Once I’m happy I have a choice – if the colour scheme I’m aiming for is dark then I can draw on top of the graphite (with care) but if it’s bright and breezy then first I’ll ‘dab’ off the graphite drawing with a pencil rubber so that it leaves the faintest of lines. I could of course draw faintly to start with, but that’d mean using a HB or 2H and that can leave ugly scratch marks on the paper. Sometimes I draw out my composition not in graphite but with a colour pencil, that way it’s guaranteed to be absorbed by the overlaying colours. The advantage of this is that there’s no risk of graphite smudging areas of delicate detail, such as a creamy complexion on a child’s face for instance. The down side of sketching with a colour pencil first is that they don’t like being rubbed out! You’re dealing with pigment that’s got oil or wax in, and the rubber can’t always get rid of the lines as it can with graphite – so be warned. If I draw in CP first then invariably I’ll use ‘nougat’ which is a nice subtle brown shade in the Polychromos range.
So now the under-drawing’s ready and the colour work can start. I draw a lot of human characters and they can be tricky, so I always start with the face which is the hardest part. If it goes bad then I scrap the picture and haven’t lost too much time. I use a range of colours, finding they all have their strengths and weaknesses . . .
Polychromos by Faber Castelle keep their point well and have good opacity, great for fine detail.
Prismacolor (American) mix and blend better than any other brand I’ve come across. They are softer, and so not as good for crisp fine detail. Not easy to source in the UK.
Derwent Drawing pencils come in a range of 24 earth/natural colours. They are great for nature studies and their cores are quite wide so good for laying down large areas of expressive colour.
Derwent Coloursoft have a wide core and are like Prismacolor in many ways, but I find them a little ‘chalky’ and so I only have a small range, although some of them I wouldn’t do without – cloud blue and brown-black spring to mind.
Lastly on the subject of pencils, don’t forget to include a good range of grey shades. I’ll often add a hint of grey to skin tones, sandwiched in between other pigments. Relying on colours alone can give an artificial ‘Disney’ look to a scene. So don’t forget the greys. I rely on my range of French Greys a lot.
Accessories: I have a small battery powered rubber that’s very handy if you’ve got to alter a small detail in a crucial place. It’s also great drawing tool in its own right, removing colour rather than laying it down.
Pencil extenders – better than throwing 30% of your pencils in the bin! Don’t know why more people don’t use them . . .
Scalpel – always use one for sharpening pencils and for scratching the finest lines in pigment to draw hair or spider silks etc.
Fixative: I use fix not to protect the drawing, but to get rid of wax-bloom. Once your drawing’s finished you might find it looking ‘dusty’ after a few days and wonder what’s going on. It’s wax-bloom. The oils in the pencils are now seeping to the surface. It’s easy to remove, you can either just fix it to seal it and restore the drawing, or wipe it gently with a soft tissue, and then either fix it or leave it – but the wax might come back. As I tend to work heavy there’s a lot of pigment on my drawings and the bloom can be a problem, so I let them ‘rest’ a few weeks then dust them down and spray them, but never spray too much at any one time as it’ll permanently discolour the drawing!
And lastly – tea, plenty of tea . . .
